How to disable Windows Defender on Windows 10/11
In this article I will guide you how to disable Windows Defender on Windows 10/11
You can temporarily disable Windows Defender on Wndows 10/11 by Settings
Step 1: You go to the taskbar and type Windows Defender, then you click Windows Security (Microsoft changes name Windows Defender to Windows Security)

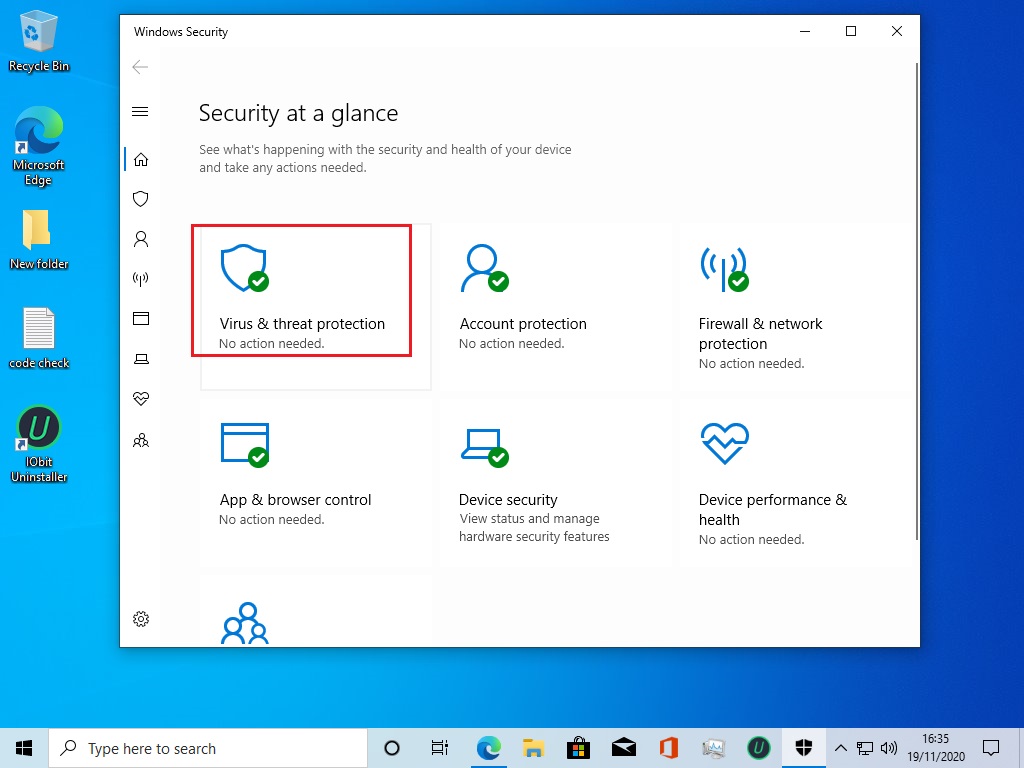
Step 2: You select Virus & threat protection
Step 3: In Virus & threat protection setting, you click Manage settings

Step 4: In Real-time protection, you change On => Off

Done. You will see the result

You can watch this video to know how to temporarily disable Windows Defender: