How to Add Screen Recording on iPhone
Screen recording is a handy feature that lets you capture what’s happening on your iPhone’s display. Whether you’re creating a tutorial, saving a video clip, or showing a tech issue to support, iOS makes screen recording simple. Here’s a step-by-step guide on how to add and use screen recording on your iPhone.
Step 1: Make Sure Your iPhone Supports Screen Recording
Screen recording is available on iPhones running iOS 11 and later. To check your iOS version:
- Go to Settings.
- Tap General > About.
- Look for the iOS Version listed.
If you have iOS 11 or later, you’re good to go.
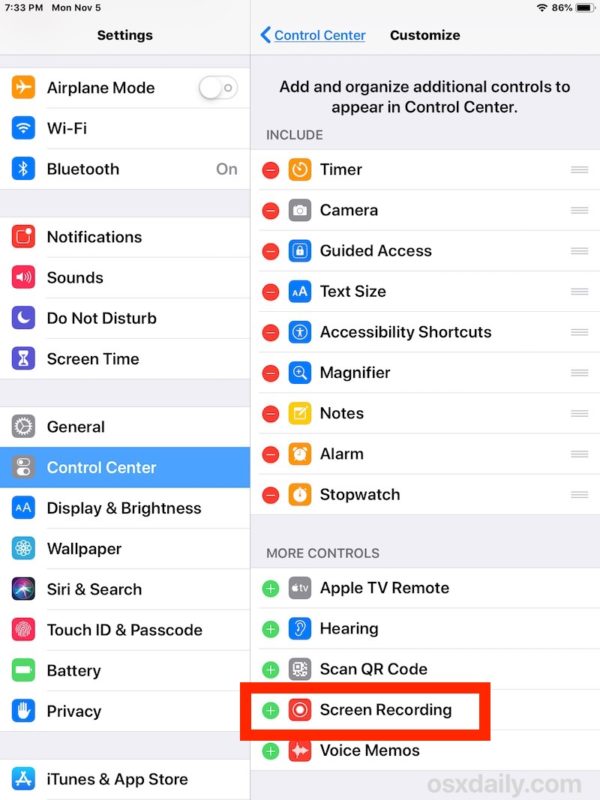
Step 2: Add Screen Recording to Control Center
Before you can use the feature, you need to add it to the Control Center.
- Open the Settings app.
- Tap Control Center.
- Scroll down to More Controls.
- Find Screen Recording and tap the green plus (+) icon next to it.
Once added, you’ll find the screen recording icon in the Control Center.
Step 3: Start a Screen Recording
- Open Control Center:
- On iPhones with Face ID: Swipe down from the top-right corner of the screen.
- On iPhones with a Home button: Swipe up from the bottom of the screen.
- Tap the Screen Recording button (a circle inside another circle).
- After a 3-second countdown, your iPhone will start recording everything on the screen.
Tip: If you want to record your voice or external sound, long-press the Screen Recording button and tap the Microphone icon to turn it on before starting.
Step 4: Stop a Screen Recording
To stop recording:
- Tap the red status bar or red Dynamic Island indicator, then tap Stop.
- Or, go back to Control Center and tap the Screen Recording button again.
Your video will be saved automatically to the Photos app.
Step 5: Find and Edit Your Screen Recording
- Open the Photos app.
- Go to Recents or Screen Recordings album.
- Tap the video to watch, share, or edit it using the built-in editing tools.
Final Tips
- Storage: Make sure you have enough storage space before recording.
- Do Not Disturb: Turn on Do Not Disturb to avoid unwanted notifications during the recording.
- Privacy: Be mindful that everything on screen, including notifications, will be recorded unless Do Not Disturb is enabled.